建立本地儲存庫
現在,讓我們建立一個本地儲存庫並將其置於 Git 版本控制之下,以便我們可以在本教程的其餘部分中使用它。
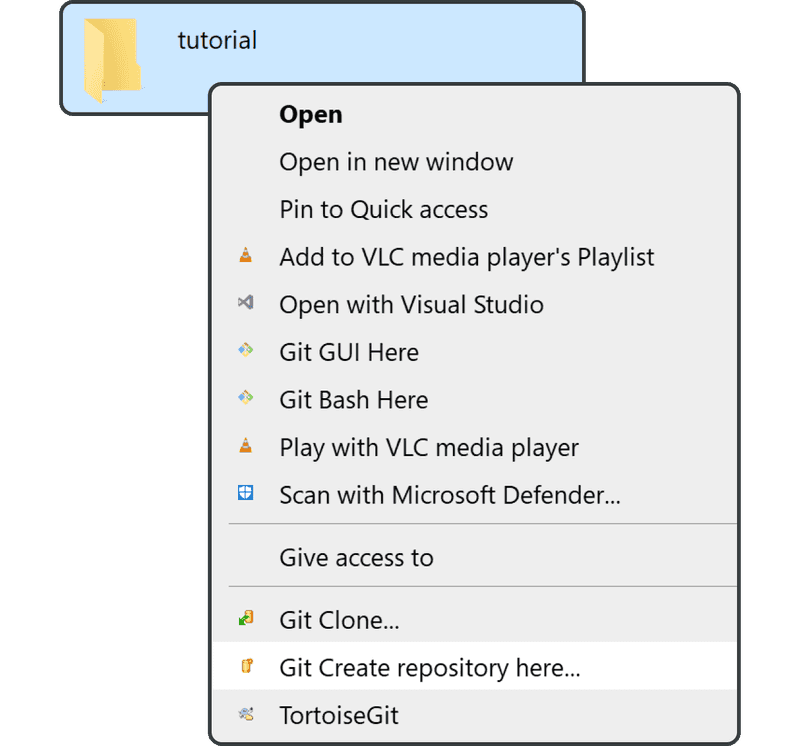
您可以在電腦上的任何位置建立這個新目錄— - 只需將其命名為「tutorial」即可。
右鍵單擊,並單擊「Git Create repository here」以使 Git 可追蹤該目錄。
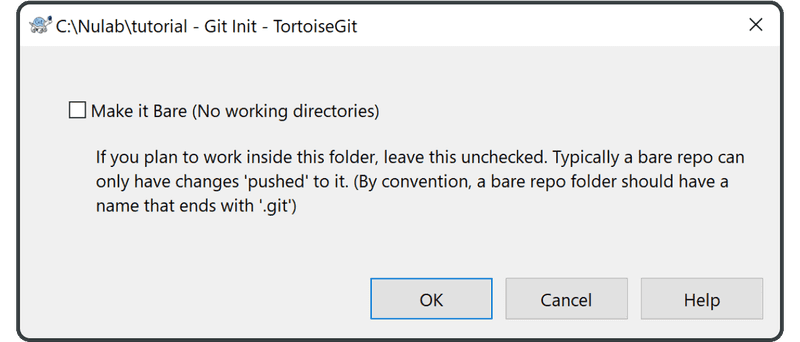
在下面螢幕上單擊「OK」 - 請勿勾選「Make it Bare」。
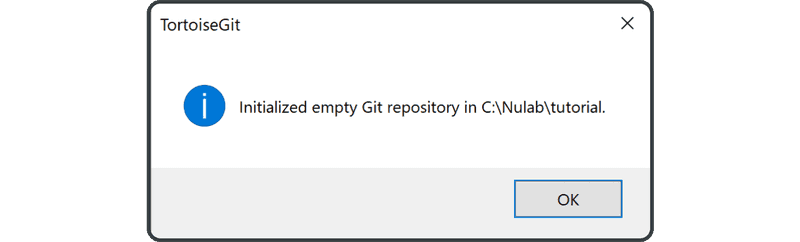
建立儲存庫後,單擊「OK」關閉下面提示。
如果正確完成,「tutorial」目錄將有一個新的圖示,如下圖所示。如果圖示保持不變,請嘗試右鍵單擊該檔案,並選擇「Update to the latest status」。

現在您已準備好將檔案提交到儲存庫。