创建远程存储库
我们将在 Backlog 中创建一个远程存储库,我们在本教程的开头提到过版本控制软件。
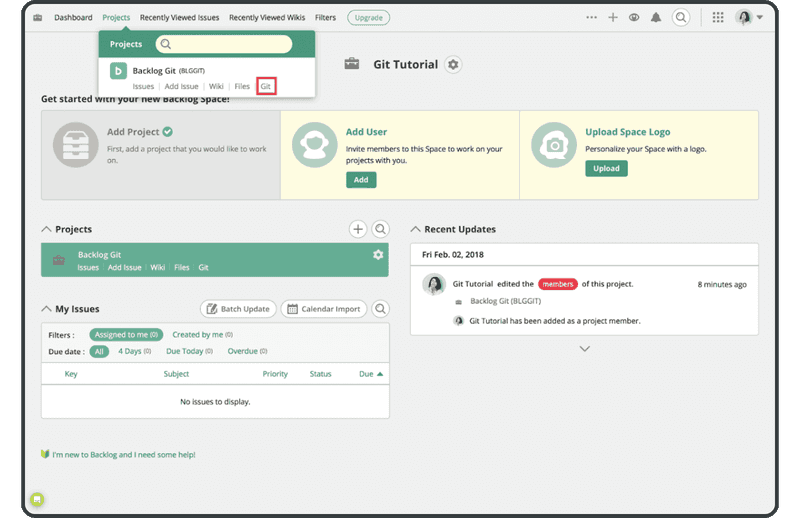
首先,登录到 Backlog,然后从要在其中创建存储库的项目菜单中单击“Git”。如果您还没有项目,则需要先创建一个。
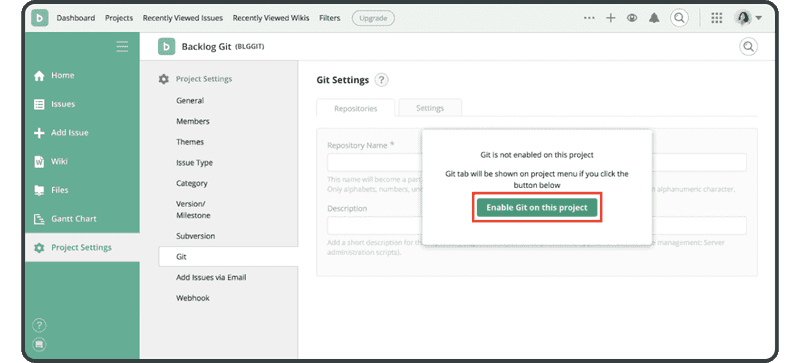
如果 Git 没有显示如上图,您将必须启用它,可通过选择项目,转到“Project Settings” > “General”,然后单击标记为“enable Git”的复选框。
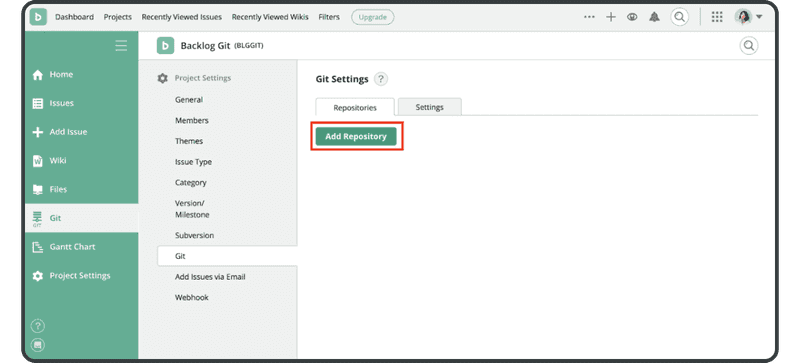
启用 Git 后,在同一个 Git 屏幕上单击“Add Repository”以添加存储库。
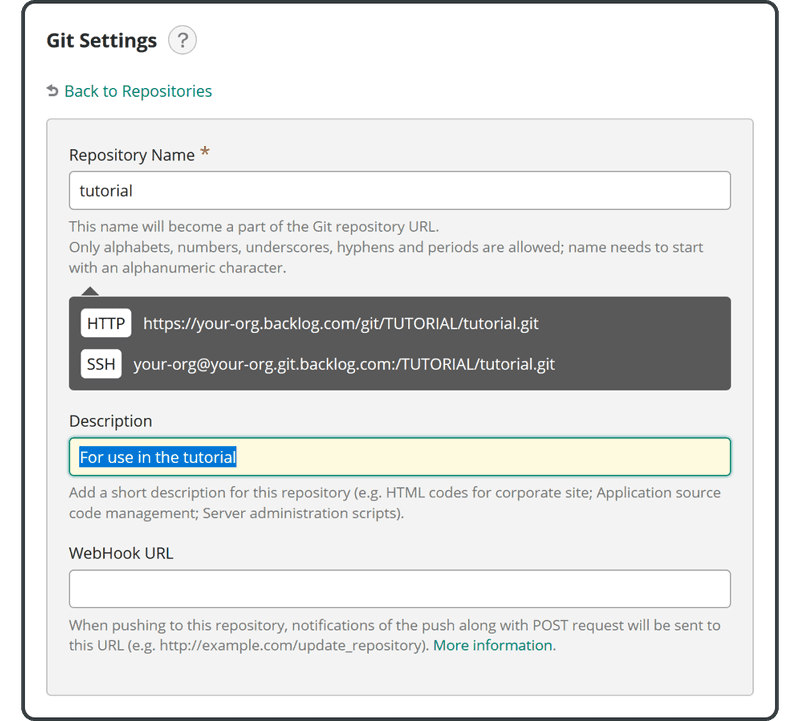
输入以下名称和描述,然后单击“Create Repository”按钮:
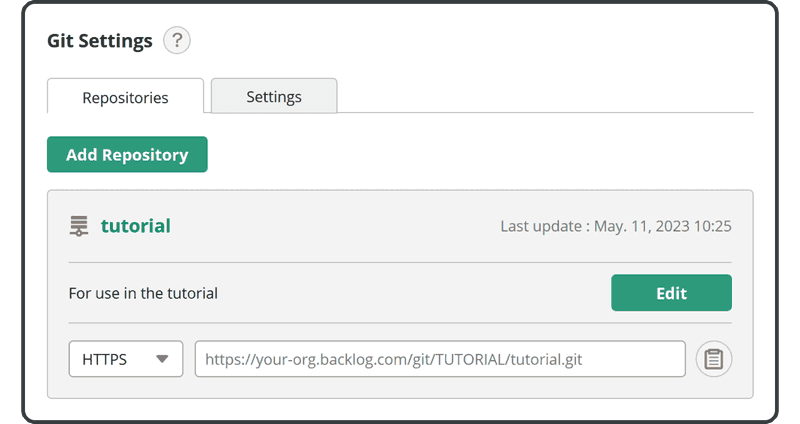
- 名称:“tutorial”
- 描述:“For use in the tutorial”
成功添加新存储库后,您将看到下面的面板。
现在您可以开始将更改推送到此远程存储库。