How many programmers are working on your software at any given time? If you’ve thrown out a number higher than “one,” you probably understand the need for version control!
When one (or ten) people are working to develop new code while others are working on bug fixes, things can get a little hairy. Version control makes it possible for everyone on the team to work independently on various aspects of code and then merge those updates together. If something goes awry (doesn’t it always?), the team can always roll back to earlier versions of the codebase.
While life without version control is pretty unbearable, it comes with its own set of challenges, like application programming interface (API) compatibility, data migration, and code maintenance.
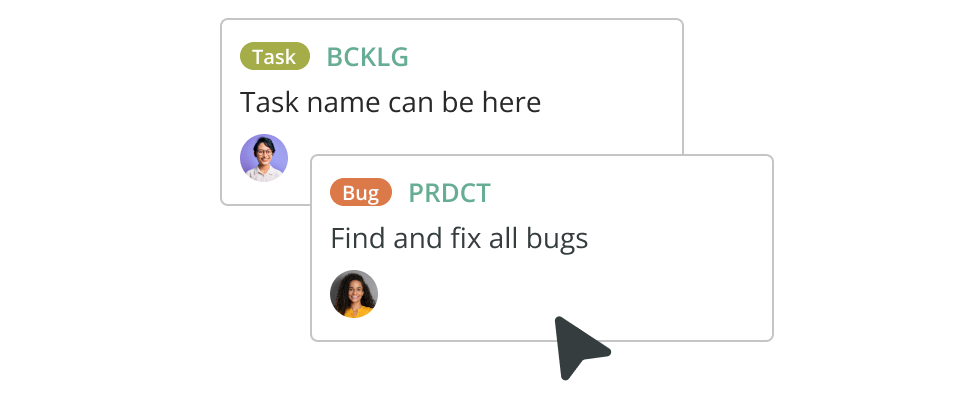
Nulab’s project management tool, Backlog, seamlessly integrates code versioning features with a range of other essential functionalities, making it a vital tool for software development teams (and their sanity). Backlog incorporates Git and Subversion, two popular version control systems (VCS), allowing developers to manage code changes effectively.
Teams can track modifications, collaborate on branches, resolve merge conflicts, and maintain a complete history of their project’s evolution. Moreover, Backlog integrates code versioning with its issue tracking, project management, and collaboration features, enabling teams to streamline their development processes. Developers can link commits and branches to specific issues, track progress, assign tasks, and collaborate on code reviews, which fosters transparency, traceability, and efficient collaboration.
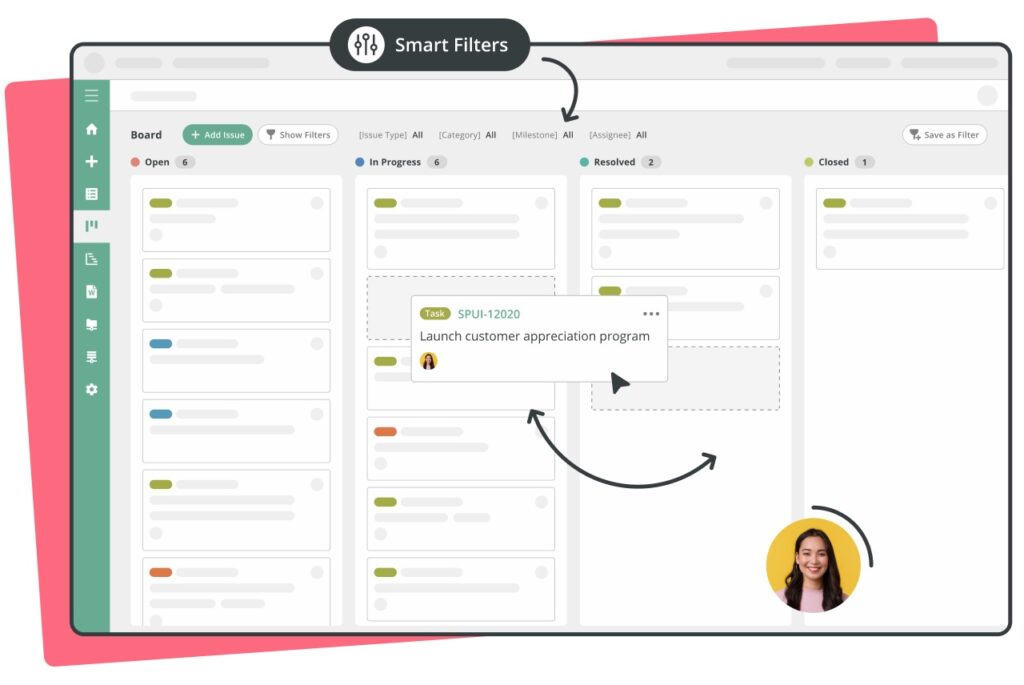
Getting started with Backlog’s code versioning features
Before you can utilize Backlog’s code versioning features, you’ll need to set up a project and connect it to a VCS, e.g., Git or Subversion. Follow these steps to get started.
- Create a project: Provide a name, description, and other relevant details to set up a project workspace. Keep in mind that your organization’s administrator manages individual user privileges. Only administrators can add projects.
- Enable version control: Toggle to project settings and enable the version control feature. Backlog supports both Git and Subversion, so choose whichever you prefer.
- Create a repository: Create a repository for your project, ensuring that you specify a repository name, VCS type, and any other required configuration options.
- Connect to the version control system: Open your VCS (Git or Subversion) client on your local machine.
- Clone your repository: In the project navigation menu, find and click the “Repository” or “Code” section. Once on the repository management page, locate the repository to clone.
- Git: If you are using Git, copy the clone URL located next to the repository in question. You can then use Git command-line, Git GUI, or SourceTree to clone the repository via the copied URL.
- Subversion: If subversion is your VCS of choice, click the “clone” button next to your desired repository. You will be provided a URL to access the repository. Use a Subversion client to clone the repository to your local machine.
Open your VCS and choose the option to clone a repository. Paste the URL (see immediately above) and follow the prompts to complete the cloning process.
- Update settings: Once you’ve located the repository where you want to configure the settings, click the repository name to arrive at the settings. The alterable settings vary slightly depending on your VCS. Project administrators and administrators can update project settings.
- Git settings: default branch, merge options, access controls, branch protections, and repository visibility.
- Subversion settings: access controls, enable/disable features, user permissions, and repository hooks.
Working with code branches in Backlog
Code branches are separate paths within a codebase that allow developers to work on features or fixes without interfering with the main codebase. Branches provide isolation and independent development.
- Isolation: Code branches enable isolation to work on a specific feature or bug. Changes, experimentation, and testing occur without affecting the main codebase or disrupting other in-progress development. This isolation minimizes the risk of introducing bugs or breaking existing functionality.
- Independent development: Code branches allow developers to work on multiple features concurrently. Because each branch represents a specific task or piece of work, programmers can collaborate, make iterative changes, perform testing independently, and then merge the changes into the main codebase, which is typically faster than sequential development.
Creating, updating, and deleting code branches in Backlog
Users can create, update, and delete code branches with Backlog’s web interface or the command line.
Creating a new code branch
- Web Interface: Navigate to the repository section of your project and look for the option to create a new branch. Provide a name for the branch and select the main/ base branch. Click “Create” to develop a new branch.
- Command Line: In your local development environment, navigate to the repository directory using the command line.
- Git: Use the command git branch <branch-name> to create a new branch.
- Subversion: Use the svn copy <URL_of_trunk> <URL_of_branch>.
Updating a code branch
- Web Interface: Select the branch you want to update. Click “Edit” to edit the code and “Commit” to save your changes.
- Command Line: In your local development environment, navigate to the repository directory using the command line.
- Git: After ensuring you are on the branch you want to update, use the command git add to stage the changes, git command -m “Commit message” to commit the changes to the branch, and git push origin <branch name> to push the changes.
- Subversion: Switch to the branch you want to update using the svn switch <URL_of_branch>.
Deleting a code branch
- Web Interface: Select the branch you want to delete, look for the delete option associated with the branch, and confirm the deletion when prompted.
- Command Line: In your local development environment, navigate to the repository directory using the command line.
- Git: Use git branch -d <branch-name> to delete the branch locally or git push origin –delete <branch-name> to delete the branch.
- Subversion: Use the svn delete <URL_of_branch> command to delete the branch from the repository.
Viewing branch list, details, and graph in Backlog
In Backlog, you can view the branch list, details, and graph in the following ways:
- Branch List
- Navigate to your project’s repository section.
- Click the “Branches” or “Code” tab/menu to access the list of branches.
- The branch list typically shows the branch names, associated authors, commit messages, and timestamps; it provides an overview of the existing branches in the repository.
- Branch Details
- Access the branch list.
- Click a specific branch name to view its details, e.g., the branch name, associated author, commit history, recent activity related to that branch, differences between the branch and its base branch, merged or pending merge requests, and any associated issues or tasks.
- Branch Graph
- Navigate to your project’s repository section in Backlog.
- Click the “Branches” or “Code” tab/menu to access the branch list.
- Depending on the Backlog version or configuration, you may find a “Graph” or “Network” view option.
- Click the graph option to visualize the branch graph, which provides a visual representation of how branches are connected, merged, or diverged in your repository to understand the relationships between branches and their history.
Using branch prefixes and naming conventions to organize
Branch prefixes and naming conventions can be used to organize and identify code branches. Consider the following tips when determining the appropriate naming conventions in Backlog:
- Define a branch prefix to represent different branch types.
- Use descriptive names that indicate the branch purpose or task it represents.
- Follow consistent naming conventions that include key elements like task numbers, keywords, or a version number to identify easily.
Collaborating and communicating with code reviews and pull requests in Backlog
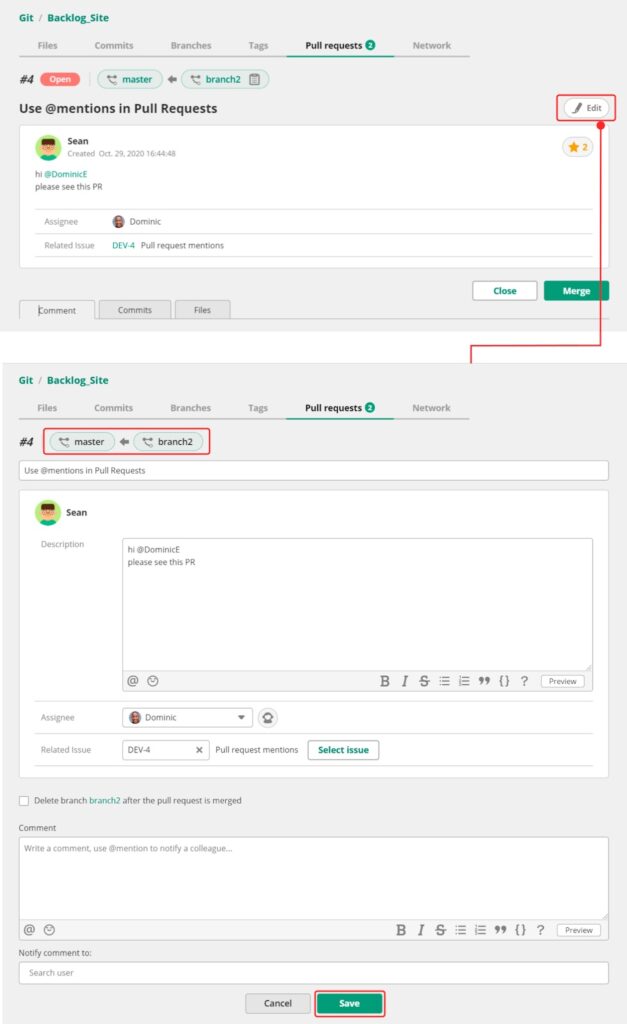
Code reviews are regular source code reviews to ensure quality, correctness, maintainability, and adherence to coding standards. Pull requests, which include a summary of changes, the affected files, and any additional context or comments, are often associated with version control systems and allow a discussion of changes to occur prior to merging code. Code reviews and pull requests allow developers to collaborate effectively, maintain code quality, and leverage the team’s collective knowledge to produce better outcomes.
Creating, updating, and closing pull requests in Backlog
Backlog allows users to create, update and close pull requests using the web interface or the common line in conjunction with Git or Subversion.
Create a pull request
- Web Interface: Navigate to your project’s repository and locate the branch you want to merge into the codebase. Click “Create Pull Request,” provide a title, description, select the target branch, and then submit the request.
- Command Line: Ensure you are on the branch you want to merge in your local environment and then:
- Git: Use the command git push origin <branch-name> to push the branch to the remote repository.
- Subversion: Pull requests in Backlog are associated with distributed VCS like Git rather than Subversion.
Navigate to the Backlog web interface’s project repository, locate the branch, and create a pull request as mentioned in the web interface step above.
Updating a pull request
- Web Interface: From your project’s repository, locate and click the pull request you want to update. Make additional commits or comments directly in the interface. Save or commit your changes.
- Command Line: Once the necessary changes are made in your local environment, commit them using the command git commit -m “Commit message.” Then use the command git push origin <branch-name> to push the changes to the remote repository.
Closing a pull request
- Web Interface: From your project’s repository, locate and click the pull request in question. Look for the option to close or merge the request, follow the prompts, and confirm the closure.
- Command Line: Note that pull requests are typically closed through the web interface.
Viewing the pull request lists, details, and request diff
Follow these steps to pull request lists, details, and request diff in Backlog:
- Navigate to the desired project.
- Find and click “Pull Requests” or “Code” in the project menu.
- Use the titles, authors, status, or other information in the pull request list to locate the right request.
- Click the request title to view the pull request description, comments, reviewers, and related commits.
- To view the request diff, look for a “Diff” or “Changes” tab on the details page. The diff view will show a side-by-side comparison of the changes made in the pull request.
Using features
Using features in Backlog can enhance collaboration, provide additional context, enhance communication, and improve organization. Widely used features include:
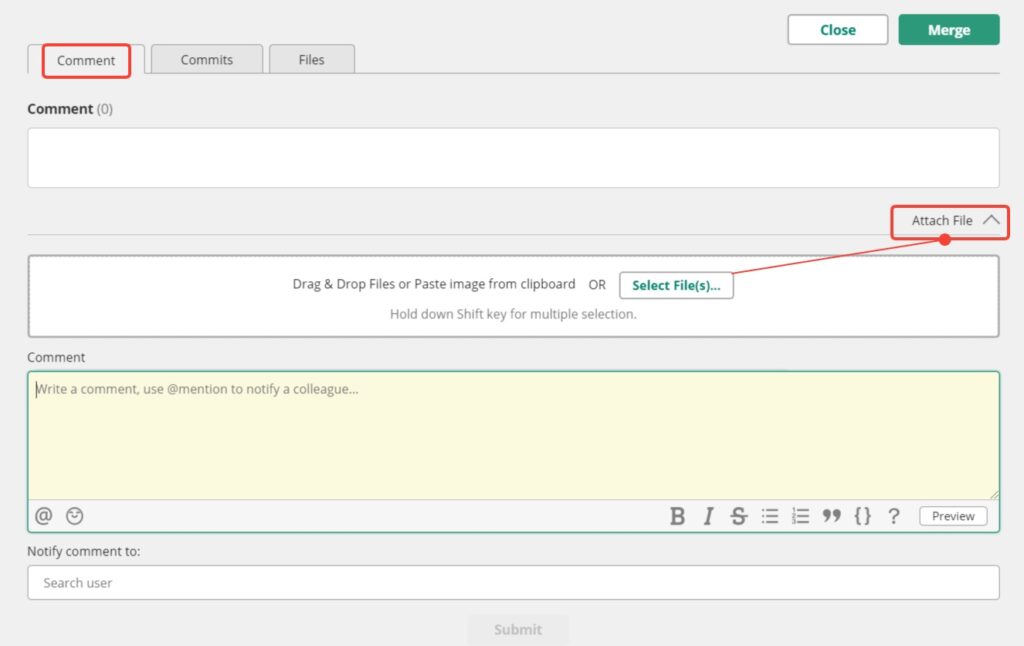
- Comments: users can provide feedback, ask questions, or discuss specific items by adding comments to issues, tasks, or pull requests.
- Mentions: notify specific team members through mentions (the “@” symbol followed by their username) to bring their attention to a particular item.
- Attachments: upload and share documents, images, or any other file type within Backlog to provide additional context.
- Emojis: express emotions and reactions through emojis by typing the emoji code or by choosing one from the emoji picker.
- Labels: classify and organize various attributes, priorities, or themes with labels that can then be grouped and filtered.
Approving or rejecting pull requests and merging or rebasing code branches
To approve or reject pull requests:
- Access the pull requests.
- Review the changes.
- Provide feedback.
- Approve or reject.
- If approved, proceed with merging the changes into the target branch using the merge button.
- Resolve any highlighted conflicts by choosing the appropriate suggested change.
- Confirm merge after resolving any conflicts.
Tracking and managing code changes and history with commits and tags in Backlog
Commits are essentially snapshots of the code at a given point in time, while tags mark important points in the commit history. Both are used to manage and track codebase changes.
Commits
- Web Interface: Creating and deleting commits is typically performed via Git client software.
- Command Line:
- Create: Run command git commit -m “Your commit message’ to create a new commit, then use git push to push your commits to the remote repository.
- Update and Delete: Generally, commits pushed to the shared repository should not be modified or deleted. Instead, create a new commit that incorporates any necessary changes.
To find more details about your commits, click the “Commits” or “History” section of the target repository. The resulting commit list will display commits chronologically and show the commit message, author, timestamp, and branch (or tag). Click the commit you want to know more about to see additional details. The resulting page will show commit details like the author, timestamp, changes made, etc.
Additionally, from the commit repository, you should be able to choose “Graph” or “Network” to access the commit graph, which displays the commits as nodes and the branch connections as lines to help you understand the branching and merging history.
Tags
- Web Interface:
- Create: After navigating to the desired project, click the “Tags” or “Labels” tab, and click “Create Tag.”
- Update: Click the icon next to the tag in question, and in the resulting tag update forum, you can update the name, color, description, etc.
- Delete: Find the tag you’d like to delete in the tags section, right-click the tag, and you can delete the tag from the resulting context menu.
- Command Line:
- Create: Use git tag <tagname><commit> where “tagname” is the name you want to give the tag and “commit” is the commit identifier (hash) you want to tag, then use git push origin <tagname>.
- Update: Because tags are meant to reference specific commits, they should not be modified.
- Delete: Old tags can be deleted by clicking the tag name and then the delete button.
Integrating with popular version control systems in Backlog
Backlog offers integration with Git and Subversion to facilitate seamless collaboration and tracking code changes within the platform.
Importing and exporting code repositories
Users can import (or export code) repositories from (or to) other VCS platforms through the web interface or the command line. For the web interface, navigate to the import section, specify the source VCS type and repository details, and initiate the import process. You must specify the source and destination VCS types and repository details for command line import and execute the appropriate commands.
To export, navigate to the repository settings/ export section, select the desired export format, and initiate the export process. Command-line tools or scripts to facilitate exporting code are available as well.
Sync code changes between Backlog and VCS platforms
To sync code changes between Backlog and VCS platforms, you typically use the push and pull commands provided by those systems.
Push
- Git:
- git add
- git commit -m “Your commit message”
- git push origin <branch-name>
- Subversion:
- Svn commit -m “Your commit message”
Once the changes are pushed to the VCS repository, Backlog will auto-sync with the VCS platform and reflect the updated changes within Backlog’s interface.
Pull
- Git:
- git pull origin <branch-name>
- Subversion:
- svn update
After pulling the changes, your local repository will be up to date with the VCS.
Webhook URLs to trigger actions
Webhook URLs allow you to set up notifications or trigger actions on other VCS platforms when code changes occur in Backlog. To do so, you need to:
- Obtain the webhook URL on the target VCS platform.
- Configure the webhook in Backlog.
- Test the webhook.
- Customize actions and notifications (as needed).
By configuring the webhook URL provided by the target VCS platform in Backlog and specifying the relevant event triggers, you can ensure that code changes in Backlog result in notifications or actions on the target VCS platform. This integration helps keep various platforms synchronized and facilitates smooth collaboration across different tools and systems.
Conclusion
Backlog’s code versioning features provide a comprehensive solution for mastering version control in software development. Best practices include:
- Following a consistent branching strategy and workflow.
- Conducting regular code reviews and pull requests.
- Writing clear and informative commit messages and tag names.
- Keeping the code repository clean and organized.
- Leveraging the integration with other VCS platforms.
Following these steps allows teams to effectively manage the codebase, collaborate on changes, improve quality, and maintain a clear audit trail.
If you’re looking to deliver high-quality software, enhance team productivity, and streamline version control processes, try Backlog’s free plan or consider a paid plan for enhanced features.
About Author

Backlog Staff
Guest authorBacklog is the all-in-one project management software by Nulab. Combining task management, version control, and bug tracking, Backlog delivers the features teams need to create great projects in one simple tool.